Global Japanese Sushi Rolls
Highlighted under: Fusion Food Recipes
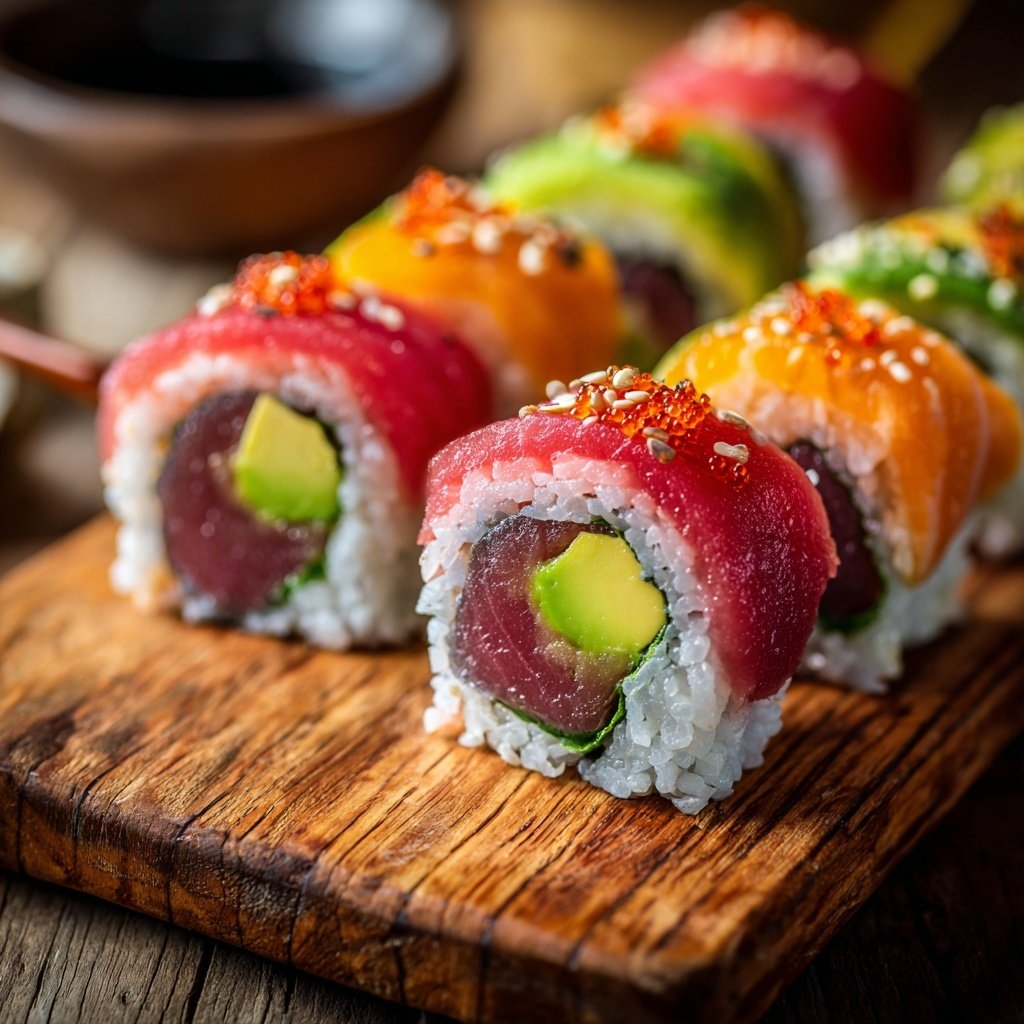
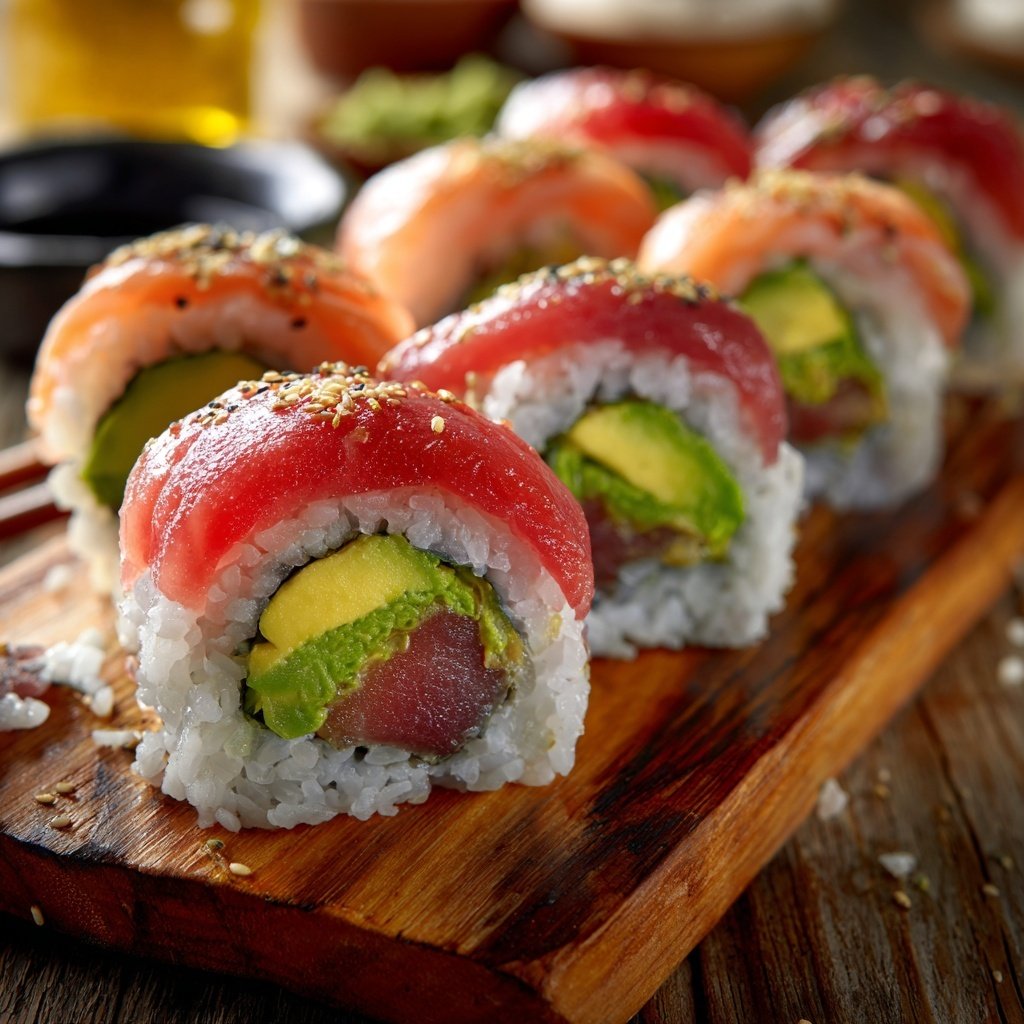
I love preparing Global Japanese Sushi Rolls for gatherings, as they always impress guests and satisfy diverse palates. The vibrant colors and the combination of fresh ingredients make these rolls not just a meal but an experience. Each roll tells a story of flavors and textures, seamlessly blending traditional Japanese methods with global influences. Experimenting with fillings like avocado, spicy tuna, and even fruits keeps the process exciting, and I relish the creative freedom that sushi-making offers.
When I first tried making sushi at home, I was apprehensive about mastering the rolling technique. However, I quickly learned that practice makes perfect. Starting with short-grain rice, I found that soaking it beforehand significantly improved the texture. This trial-and-error method helped me blend flavors and discover the joy of customized fillings, from crab to fresh vegetables.
As I refined my skills, I began playing around with presentation. I learned that using a bamboo mat not only simplified the rolling process but also ensured uniformity. Each roll became a masterpiece, drizzled with sauces or topped with sesame seeds, elevating my sushi from simple eats to works of art.
Why You'll Love These Rolls
- Fresh ingredients wrapped in perfectly seasoned rice
- Unique flavor combinations to suit every taste
- A fun activity for family or friends during gatherings
Mastering Sushi Rice
The foundation of any great sushi roll is perfectly cooked sushi rice. Ensure you rinse the sushi rice thoroughly until the water runs clear, as this removes excess starch and helps achieve the desired stickiness. I recommend using a rice cooker for consistent results, but if you opt for stovetop cooking, aim for a simmmer over low heat and cover the pot tightly. This method typically takes around 18-20 minutes, followed by letting it steam for an additional 10 minutes off the heat.
Seasoning is key for flavor. After cooking, allow the rice to cool slightly before mixing in the rice vinegar mixture. Make sure the vinegar, sugar, and salt are fully dissolved; this creates a glossy finish on the rice. Use a rice paddle to gently fold in the seasoning, taking care not to mash the grains. Aim for a balance of sweet, salty, and tangy that will enhance the overall flavor of your sushi.
Creative Fillings and Flavor Pairings
Feel free to get creative with the fillings! While classic options like avocado and shrimp are great, consider adding spicy elements like sriracha or kimchi for a unique twist. Experimenting with different textures, such as crunchy vegetables or creamy ingredients like cream cheese, can elevate your sushi game. The mix of flavors—from rich and savory to fresh and bright—makes each bite a delightful experience.
For those seeking a vegetarian option, try using roasted vegetables or mango as a sweet, fruity filling. They not only add color but also complement the savory notes of the sushi rice. Remember, balance is essential; if you use rich fillings, consider adding a refreshing component like cucumber to lighten the flavor profile.
Perfecting the Roll
When assembling your rolls, use a bamboo mat to guide the rolling process. It takes some practice to achieve the ideal tightness; too loose, and your rolls may fall apart; too tight, and the fillings may squish out. After placing your fillings towards the center, gently lift the mat and roll, applying even pressure to create a compact roll without squeezing too hard. The nori should seal reliably when you finish rolling it up.
Slicing the rolls can be tricky. Ensure your knife is sharp and moisten it between cuts to prevent the rice from sticking to the blade. Aim for 8 even pieces per roll to create bite-sized portions. If you notice your rolls are tearing when you slice, try refrigerating them for 10-15 minutes before cutting, as this firms them up and makes cutting easier.
Ingredients
Sushi Rice
- 2 cups sushi rice
- 2 1/2 cups water
- 1/4 cup rice vinegar
- 2 tablespoons sugar
- 1 teaspoon salt
Fillings
- 1 avocado, sliced
- 1 cucumber, julienned
- 4 oz cooked shrimp, sliced
- 4 oz spicy tuna (optional)
- 1/2 cup cream cheese (optional)
Others
- Nori sheets (seaweed)
- Soy sauce for serving
- Pickled ginger for serving
- Sesame seeds for garnish (optional)
Gather all your ingredients and prepare for assembling the rolls!
Instructions
Prepare the Rice
Rinse the sushi rice under cold water until the water runs clear. Combine rice and water in a rice cooker and cook according to the manufacturer's instructions. Once cooked, let it cool slightly.
Season the Rice
In a small saucepan, combine rice vinegar, sugar, and salt over low heat until dissolved. Mix this seasoning into the warm rice gently with a rice paddle, flipping to avoid mashing the grains.
Assemble the Rolls
Lay a nori sheet on a bamboo mat, shiny side down. Wet your hands to prevent sticking, take a handful of rice, and spread it evenly over the nori, leaving a 1-inch border. Arrange your fillings across the center.
Roll It Up
Using the bamboo mat, start rolling away from you, pressing gently but firmly. Continue rolling until the entire sheet is wrapped. Use a sharp knife to slice into 8 pieces. Wipe the knife with a damp cloth between cuts for clean edges.
Serve
Arrange the sushi rolls on a platter, sprinkle with sesame seeds if desired, and serve with soy sauce and pickled ginger.
Enjoy your homemade Global Japanese Sushi Rolls!
Pro Tips
- For a crispy variation, try adding tempura vegetables to your rolls. Additionally, experimenting with different sauces can bring new life to your sushi experience.
Storage and Make-Ahead Tips
Sushi is best enjoyed fresh, but if you have leftovers, store them in an airtight container in the refrigerator for up to 24 hours. Keep in mind that the rice may dry out slightly, so it's recommended to sprinkle a bit of water on top before covering. If you want to prepare your sushi ahead of time, consider making the fillings and the sushi rice the day before; just combine and roll them together when you're ready to serve.
Freezing sushi rolls is generally not recommended due to the texture of the rice, but if you need to store them longer, try freezing the fillings separately and rolling them fresh when you're ready to eat. This way, you can achieve the perfect combination of crisp and satisfying textures.
Serving Suggestions
When it's time to serve your sushi rolls, presentation matters! Arrange them on a vibrant platter, garnishing with sesame seeds or finely chopped scallions for added flair. Pair your sushi with soy sauce and pickled ginger on the side for dipping; the ginger helps cleanse the palate between different types of rolls, enhancing the overall experience.
You might also want to consider side dishes that complement your sushi, like miso soup or a light seaweed salad. This not only adds variety to the meal but also engages your guests with a truly Japanese culinary experience. Having a selection of sauces, like spicy mayo or teriyaki sauce, can also provide additional flavor layers for your rolls.
Questions About Recipes
→ Can I use regular rice instead of sushi rice?
It's best to use sushi rice for the right texture and flavor, but short-grain rice can be a substitute in a pinch.
→ How do I store leftover sushi?
Wrap well in plastic wrap and store in the refrigerator for up to 24 hours for the best taste.
→ What can I use as a filling if I'm vegetarian?
Try filling with vegetables like bell peppers, carrots, or marinated tofu for a delicious vegetarian option.
→ Can I make sushi rolls in advance?
It's best to make sushi rolls fresh to enjoy the quality of the ingredients, but you can prep the rice and fillings ahead.
Global Japanese Sushi Rolls
Created by: The Chefquinncooks Team
Recipe Type: Fusion Food Recipes
Skill Level: Beginner
Final Quantity: 4 servings
What You'll Need
Sushi Rice
- 2 cups sushi rice
- 2 1/2 cups water
- 1/4 cup rice vinegar
- 2 tablespoons sugar
- 1 teaspoon salt
Fillings
- 1 avocado, sliced
- 1 cucumber, julienned
- 4 oz cooked shrimp, sliced
- 4 oz spicy tuna (optional)
- 1/2 cup cream cheese (optional)
Others
- Nori sheets (seaweed)
- Soy sauce for serving
- Pickled ginger for serving
- Sesame seeds for garnish (optional)
How-To Steps
Rinse the sushi rice under cold water until the water runs clear. Combine rice and water in a rice cooker and cook according to the manufacturer's instructions. Once cooked, let it cool slightly.
In a small saucepan, combine rice vinegar, sugar, and salt over low heat until dissolved. Mix this seasoning into the warm rice gently with a rice paddle, flipping to avoid mashing the grains.
Lay a nori sheet on a bamboo mat, shiny side down. Wet your hands to prevent sticking, take a handful of rice, and spread it evenly over the nori, leaving a 1-inch border. Arrange your fillings across the center.
Using the bamboo mat, start rolling away from you, pressing gently but firmly. Continue rolling until the entire sheet is wrapped. Use a sharp knife to slice into 8 pieces. Wipe the knife with a damp cloth between cuts for clean edges.
Arrange the sushi rolls on a platter, sprinkle with sesame seeds if desired, and serve with soy sauce and pickled ginger.
Extra Tips
- For a crispy variation, try adding tempura vegetables to your rolls. Additionally, experimenting with different sauces can bring new life to your sushi experience.
Nutritional Breakdown (Per Serving)
- Calories: 250 kcal
- Total Fat: 6g
- Saturated Fat: 1g
- Cholesterol: 30mg
- Sodium: 500mg
- Total Carbohydrates: 40g
- Dietary Fiber: 2g
- Sugars: 2g
- Protein: 8g